Quick Links
Gleam of the Final Dawn is a chapter one quest inWarhammer 40,000: Rogue Traderthat sends you to the Electrodynamic Cenobium. Here, you will battle rebels, find a new companion, and face off in a complex boss battle. If you aren’t sure how to complete this quest, we’re here to help.
In this guide, we are going to cover a step-by-step walkthrough for completing Gleam of the Final Dawn. It’s important to note that this quest cannot be started immediately after finishing the prologue; you will first need to find the Governor at the Starport, which we will go over first.

Prerequisites To Starting Gleam Of The Final Dawn
Gleam of the Final Dawntakes place on Rykad Minoris,however you willfirst need to stop by the Starport.Here, your goal is tofind the Governor,who will point you to theElectrodynamic Cenobium,which is also on Rykad Minoris.
After speaking with the Governor, you can head here toimmediately begin Gleam of the Final Dawn.

Gleam Of The Final Dawn Quest Overview
Before diving fully into a walkthrough, let’s look at the main tasks that you will need to complete. If you are curious to see how far you are along in the quest, you’re able to use this as a reference.
Sounds easy enough, right? Let’s break this down now.
How To Reach The Tech-Priest
The Electrodynamic Cenobium isshaped like a giant ring.When you first walk in, you can head either left or right. To the right, you will findElectro-priests and a barrier blocking your way forward, forcing you to turn around.
Because of this, you will first need tohead to the left, following the loop around the Electrodynamic Cenobium.While heading left, you will see a door on the wall, which we’vehighlighted in the image above.Behind this door, you may findHeinrix von Calox, who will join your party.

It’s possible to miss this door completely and continue for a bit without Heinrix. If you missed this door,you can head back to get him at a later time.
Battle On The Way To The Tech-Priest
After you’ve found Heinrix, continue heading around the loop until you seeelectric charges coming out of the wall.The first area like this is up a short staircase; when you proceed up these stairs, a battle will start, with enemies stretching all the way back to the far wall.
This battle is pretty straightforward in terms of combat but overall, the location is pretty awkward. The electric charges will turn off and on;if you are caught in a charge, your party member will immediately die.

As such, it’s important totime your movement through these areas to not take heavy damage.Thankfully,enemies will also die when passing through this area;several will run towards you when the battle starts, so you can wait until they electrocute themselves to death.
Once the fight is over, you will see asmall path heading right, leading to the center of the ring.After an Athletics check, pass through the boxes. On the other side, you can find some loot and aconsole you will need to interact with.

Be sure to interact with this console before you move forward!
How To Save The Tech-Priest
Back on the main ‘path’ of the ring, you will loop around a room filled with enemies. Just prior to entering, a cutscene will happen, whereyou and your party members don disguises to blend in.
Walk into the large area, and you will notice that nobody is attacking; this is good, and it should stay this way if you do everything correctly. To save the Tech-Priest, you will need tocommit sabotage by doing the following three tasks.

Location
Destroy the safety system control altar
With the Tech-Priest on the left-hand side, the control altar is north of the throne
Utter the Litany of Actuation from the command throne
In the center of the room, overlooking the area where the Tech-Priest is

Order the distribution servitor to raise the output to peak values
Near the back of the room, closer to the ‘center’ of the ring

Before beginning any of these three tasks,we recommend saving!If you fail a check,battle will immediately begin against 27 enemies.This isn’t ideal, but you canreload previous saves and redo the checks.For extra peace of mind, you can save after passing each one.
If you succeed in each task, a cutscene will play out andall 27 enemies will die.Although you didn’t directly fight them, you can still run around andloot their bodies.

Speaking To The Tech-Priest
From here,you just need to talk to the Tech-Priest.Ultimately, the priest will die, but we won’t spoil too much of his background. Through the conversation, you will learn some key information that will help you later in the Electrodynamic Cenobium.
How To Find The Monks
Your next step is to find thesecret entrance to the monk’s hiding place. From the room where you just were,head to the path on the east side of the Electrodynamic Cenobium. The barrier here is now gone, but shortly after walking here,you will be ambushed by some Electro-priests.
If you went right when first entering the location, you may have already battled these Electro-priests. If so,then they will not appear again and you can walk through with ease.
The Electro-priests surround you preventing you from moving. Although they can be a nuisance to deal with, they aren’t too powerful.Take out the Electro-priests on one side of you, giving you some space to move around. Electro-priests are immune to electric damage,so be careful! Lightning Arc and the shock baton weapon will do nothing here.
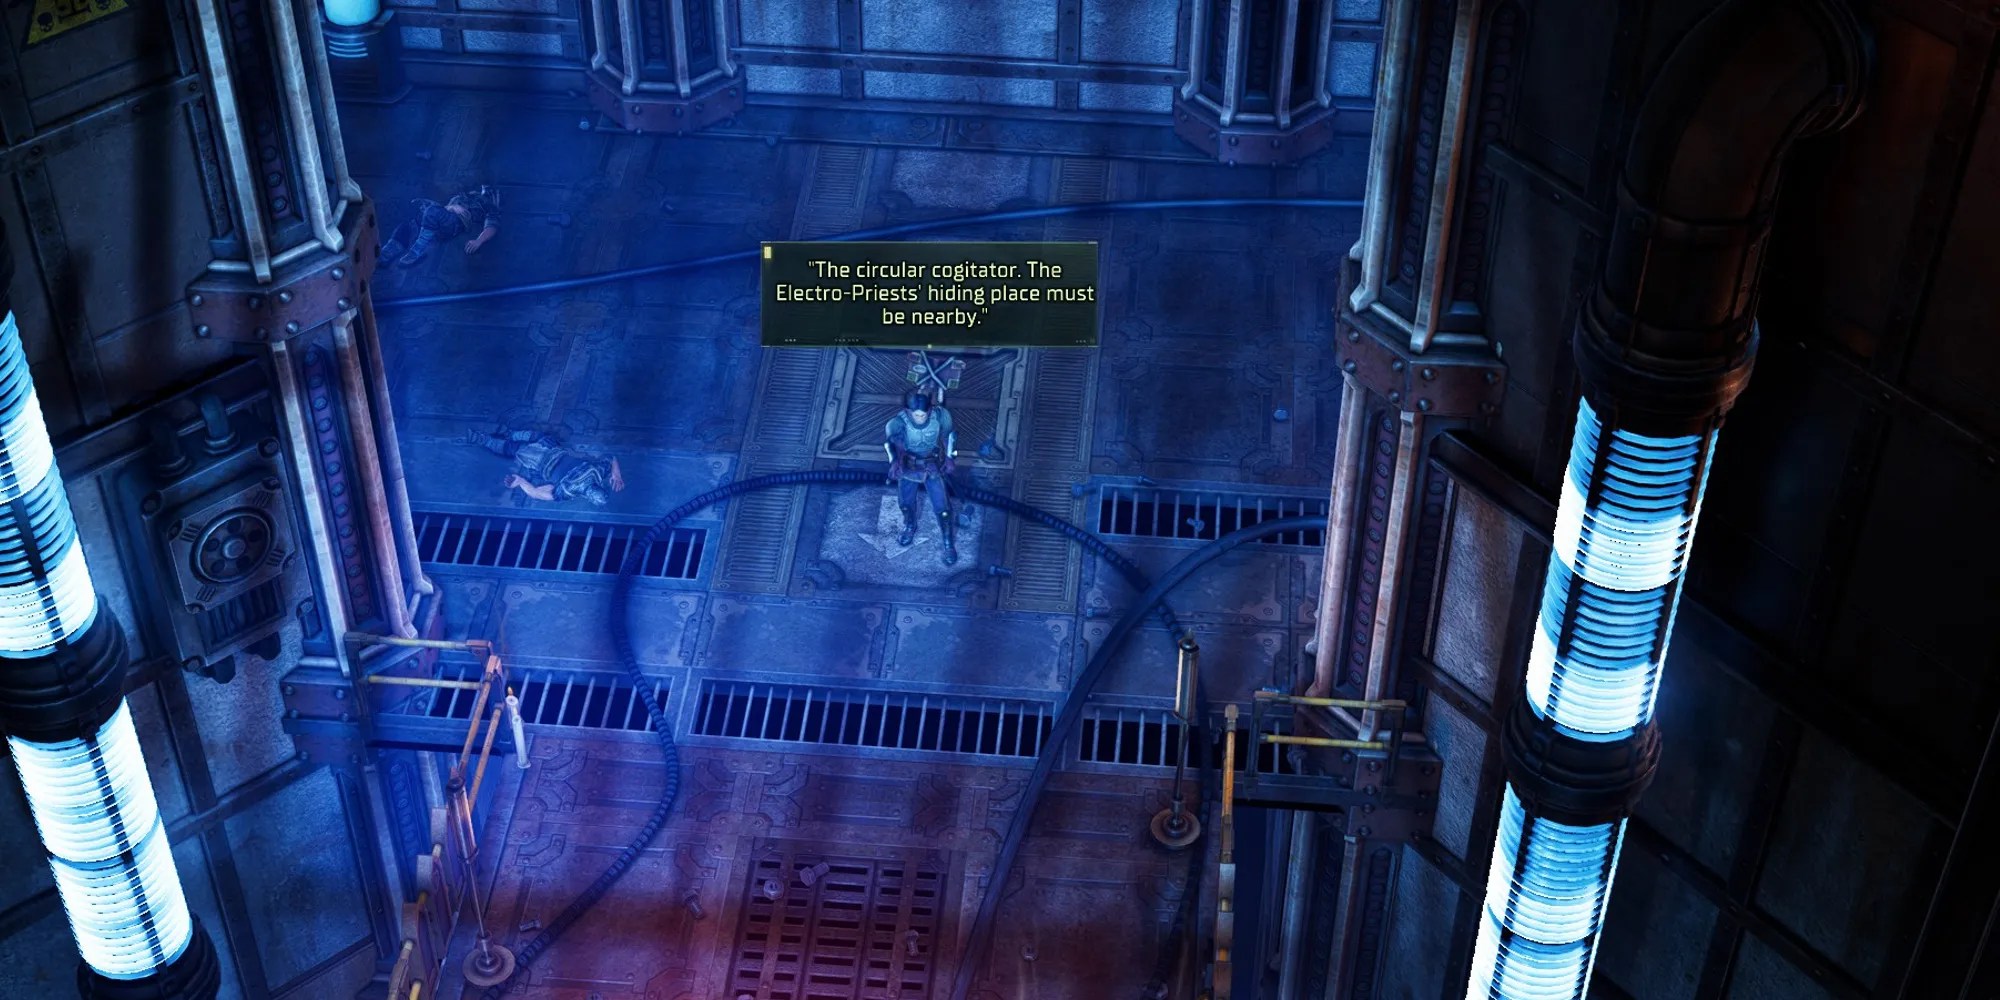
Once the priests have been taken care of, you’re able to do some exploring. If you are close enough to the platform stretching to the center of the ring,Heinrix will point out that the hiding place is nearby.Before interacting with it though, there are some rooms that you can enter!
Entering The Hymn
On the east side of the Electrodynamic Cenobium,above the area with the circular cogitator,you will find a room with a console in it. This console will ask you to enter a hymn and when entered correctly,a door will open to a bit of loot that you can gather.The correct choices are2, 5, and then 4.
Mummified Priests
On the bottom portion of the east side of the Electrodynamic Cenobium, you will find another door. Inside, there is a desk, as well astwo more doors that appear when you get closer.Behind the left door is amummified priest that you can speak to.This is optional, but it will provide some context to what is going on.
By speaking (and persuading) to this priest, you can also get abuff that provides deflection and armor against shock damage.
How To Open The Door To The Monk’s Hiding Place
After you’ve finished exploring, head to the circular cogitator that Heinrix pointed out. Upon interacting with it,a door will then open.Inside, you will find a few Priests that can be interacted with. After you’re done here,go through the door that leads down.
How To Beat Aurora
Through the door, you will be in a small chamber that connects to a larger room. This is the room right before the final boss fight, sobe sure to save here!Once ready, head into the bigger room, whichtriggers a cutscene with Aurora.
Rather than directly battling Aurora,you will fight 24 of her minions.This is a lot, and to top it off, you will have aturn limit.At the start of the battle, there aretwo turns left until the reactor explodes.This limit can beincreased as you kill Electro-prieststhat are positioned around the area.
Remember, these Electro-priests areimmune to electric damage; reserve these attacks for the rebels instead.
At the start of the battle, we recommendsetting up three people on each side of the room.Be sure to have a mix of melee and ranged on each side. With this, you cansplit your attention to both lanes, without one side struggling.
Your priority should be killing each Electro-priest,as they provide one additional turn. Thankfully, the surrounding rebels are pretty simple to take out. If you are close enough to both an Electro-priest and a rebel,the priest may use an electric attack that deals damage to the rebel as well.
Overall, we suggestusing AoE attacks,as well as melee attacks that deal a lot of damage. For example, Abelard’s Charge skill will movehim forward to an enemy to deal damage.This can help cover more ground while attacking at the same time.
This battle can be difficult,so it’s okay if you restart a few times.In general, remember totake out the Electro-priests while stretching your party to the back of the room quickly. AoE ranged attacks are pretty much essential totake down the groups of rebels so you may focus on the Electro-priests.
How To Complete Gleam Of The Final Dawn
After defeating all 24 enemies, another cutscene will occur with Aurora, but interestingly, she will die. All that’s left to do isloot her body, and then leave.
From the Electrodynamic Cenobium, you will just need tohead back to your ship(where a cutscene with Heinrix will play out), and thennavigate to the Governor.After a conversation with him, Gleam of the Final Dawn will be completed. As an added bonus,this will also complete New Blood.
